How to build stronger fingers safely, progressively, and without injury
If you've been climbing for a year or two and hit a plateau somewhere around 6b–6c, there's a good chance your fingers are the limiting factor. Not your technique (though that matters too), not your shoulder strength — your crimp strength. The ability to hold small edges under tension is what separates climbers who project 7a from those who tick it.
This guide breaks down the anatomy, the methodology, and the tools you need to build crimp strength safely and effectively — without blowing a pulley.
Understanding the Crimp: Anatomy First
Before training anything, you need to understand what you're training.
The crimp grip recruits the flexor digitorum profundus (FDP) and flexor digitorum superficialis (FDS) — the deep and superficial finger flexors — together with a network of pulleys (A2 is the most commonly injured) that keep the tendons close to the bone. The full crimp position (fingers fully curled with the thumb locked over the index) creates maximum mechanical advantage but also maximum strain on the A2 pulley. The half-crimp (fingers bent ~90° at the PIP joint, no thumb) is the gold standard for training because it builds strength with significantly lower injury risk.
The other critical point: tendons adapt much more slowly than muscles. You can build muscular endurance in 4–6 weeks. Tendons need 6–12 months of consistent stimulus to remodel and strengthen. This mismatch is why most finger injuries happen — climbers feel strong, push hard, and the pulley or tendon simply isn't ready.
Rule #1: train below your maximum. Always.
The Three Pillars of Crimp Strength Development
Effective finger training sits on three pillars. Miss one and you either plateau or get injured.
1. Structural Integrity (Tendon Health)
Before you can train strength, you need healthy, adapted tendons. If you've been climbing less than 2–3 years, or returning from injury, this phase comes first. It means: lower loads, higher reps, longer rest, and patience.
2. Maximum Strength
Peak force production — how hard you can squeeze a hold for 5–10 seconds. This is primarily trained with heavy dead hangs and maximum recruitment protocols (MVC hangs).
3. Strength Endurance
How long you can sustain a high percentage of that maximum force — critical for longer boulder problems and routes with sustained finger-intensive sequences. Trained with repeaters and density hangs.
The Training Methods: A Systematic Breakdown
Dead Hangs (for Maximum Strength)
Dead hangs on a hangboard or fingerboard are the most evidence-supported method for building finger strength. The protocol:
- Edge size: 20mm is a common standard. Use whatever edge requires you to add weight to hit failure in 5–10 seconds.
- Grip position: half-crimp or open-hand. Avoid full crimp for board training.
- Load: bodyweight + added weight (via vest or belt) or bodyweight - unloaded (via pulley/assist band)
- Sets/rest: 3–5 sets, 3–5 minutes rest between sets
- Frequency: 2x per week maximum. Tendons need 48–72 hours to recover.
A good starting benchmark: if you can dead hang a 20mm edge for longer than 12 seconds at bodyweight, add weight. If you can't hang for 7 seconds, use an assist band.
The GripLab Pulling block is a versatile tool for this work — compact enough for home use, adjustable enough to target different edges and grip positions without needing a full wall-mounted board.
7-3 Repeaters (for Strength Endurance)
Repeaters are the workhorse of finger training. The classic protocol:
- 7 seconds on / 3 seconds off, repeated 6 times = 1 set
- Rest 2–3 minutes between sets
- 3–4 sets per session
- Intensity: ~60–70% of your maximum hang intensity (you should be able to complete all 6 reps, fatigued but not failed)
Repeaters develop both the neuromuscular system and local metabolic capacity in the forearm. They're less taxing than max hangs and can be done more frequently — 3x/week in a well-structured mesocycle.
Tip: The 10 seconds on / 5 seconds off variation (Eva López protocol) shifts the stimulus slightly toward strength. The 7-3 protocol is better for strength endurance. Know which quality you're targeting.
Force Board Training
The Force Board (also called a tension board or systems board) takes crimp training into dynamic territory. Unlike passive hangs, a board lets you train pulling movements — lock-offs, move-through positions, and actual climbing-specific recruitment patterns.
Key exercises on a Force Board:
- Lock-off pulls: Pull to a specific height and hold for 5 seconds. Trains the isometric component of a climbing move.
- Repeater pulls: Identical to hangboard repeaters but with movement — pull to chin height, lower controlled, repeat.
- 1-arm progressions: Advanced. Only once you have solid 2-arm strength.
The advantage of board training over pure hanging is specificity — you're recruiting fingers and pulling muscles together in the pattern that actually occurs when climbing. For climbers targeting 7a+, integrating Force Board sessions 1x/week alongside hangboard work produces faster gains than hangboard alone.
How to Periodize Finger Training
Random training produces random results. Finger strength responds best to structured mesocycles with clear phases.
Phase 1: Structural Adaptation (4–6 weeks)
Goal: prepare tendons for heavier load.
- Light loads (60–70% max), higher reps
- Focus on open-hand and half-crimp
- 2x/week
- No max effort, no to-failure work
Phase 2: Maximum Strength (4–6 weeks)
Goal: recruit maximum motor units.
- Heavy dead hangs: 5–10 second hangs, close to 90% max
- 3–5 sets per session, 3–5 min rest
- 2x/week
- Monitor finger health daily — any twinge, reduce load immediately
Phase 3: Strength Endurance (4–6 weeks)
Goal: sustain high force output over time.
- 7-3 repeaters at 65–75% max
- 3–4 sets, 3 sessions/week
- Pair with climbing volume to build transfer
Phase 4: Power Endurance / Integration (2–4 weeks)
Goal: apply gains on the wall.
- Reduce fingerboard volume
- Increase quality climbing sessions
- Campus board (if advanced)
- Route or boulder redpointing
After each full cycle (16–20 weeks), take 1 week completely off fingers, assess, and plan the next cycle.
Injury Prevention: What Most Climbers Get Wrong
The Warm-Up Is Non-Negotiable
Before any finger training session:
- General warm-up: 10 minutes of light aerobic activity (jumping jacks, jump rope, light cardio)
- Joint mobilization: wrist circles, finger extensions, tendon glides
- Finger warm-up: 2–3 sets of easy hangs at 40–50% intensity before working sets
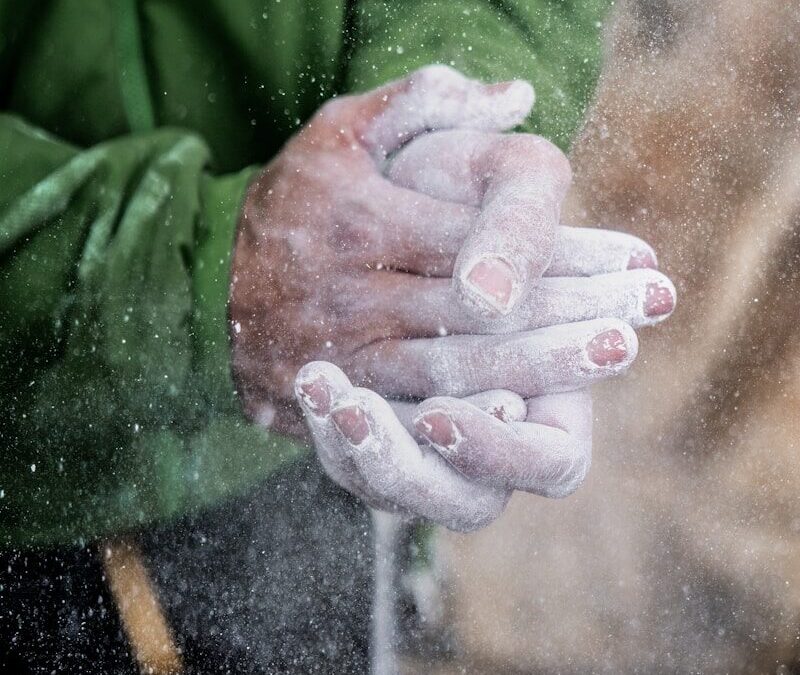
Cold tendons are brittle. The A2 pulley can handle enormous forces when properly warmed up. It snaps under surprisingly modest loads when cold.
Listen to the Difference Between Pain and Discomfort
Training-induced discomfort (pump, fatigue, slight ache during the work) is normal. Pain is a signal, not a weakness. Any sharp pain, clicking, or pinching sensation in the finger joints means stop immediately. Training through finger pain is the single most common cause of climbing injuries requiring months-long rest.
The 60% Rule
One of the most underused principles: stop a finger training session when you feel approximately 60% fatigued. Not 80%, not 100%. The last 20–40% of a session produces diminishing returns on adaptation and dramatically increases injury risk. Leave something in the tank.
Recovery Matters as Much as Training
Finger tendons need:
- Sleep: 8+ hours accelerates collagen synthesis
- Protein: 1.6–2.0g/kg bodyweight/day supports tendon repair
- Rest days: minimum 48 hours between intense finger sessions
- Active recovery: light antagonist training (finger extensions, wrist extensors) 2x/week
Recommended Training Tools
For Home Training
A compact fingerboard or hangboard is the single highest-ROI piece of climbing training equipment. The Pulling block is designed specifically for climbers who want to train at home without installing a large board. Key features:
- Multiple edge sizes (from 20mm down to small pockets)
- Portable and mountable in a doorframe
- Suitable for dead hangs, repeaters, and assisted protocols
For climbers earlier in their training (fewer than 3 years of consistent climbing), the Finger Trainer is often sufficient for full finger strength development.
For Serious Strength Work
The GripLab Force Board is for climbers who want to add dynamic load and climbing-specific pulling patterns. It combines fingerboard edges with a tension/systems board layout, letting you work fingers in context rather than isolation.
The Force Board is best introduced in Phase 2 or Phase 3 of your periodization cycle — not for beginners.
A Sample Weekly Schedule
Here's how a strength endurance phase might look for a climber training 4 days per week:
| Day | Session |
|---|---|
| Monday | Fingerboard: 7-3 Repeaters, 4 sets |
| Tuesday | Rest or antagonist training |
| Wednesday | Climbing: technique and limit bouldering |
| Thursday | Force Board: lock-off repeaters, 3 sets |
| Friday | Rest |
| Saturday | Outdoor climbing or projecting |
| Sunday | Rest |
Adjust volume based on how your fingers feel. If you're waking up with soreness in the A2 area (base of the ring finger), reduce session intensity by 20% and add a rest day.
The Long Game
Crimp strength takes years to develop fully. Most elite climbers cite 5–8 years of consistent training before reaching peak finger strength. This isn't discouraging — it means the ceiling is high, and the gains compound.
The climbers who make steady progress share a few traits: they train consistently below their maximum, they periodize with intention, they respect rest and recovery, and they invest in quality tools that let them train at home when the gym isn't an option.
Start with the basics: a Finger Trainer, a structured 6-week repeater protocol, and the discipline to stop before you're fully cooked. The gains will come.
GripLab makes training equipment for climbers who take their fingerwork seriously. Check out the Finger Trainer and Force Board in our shop.